

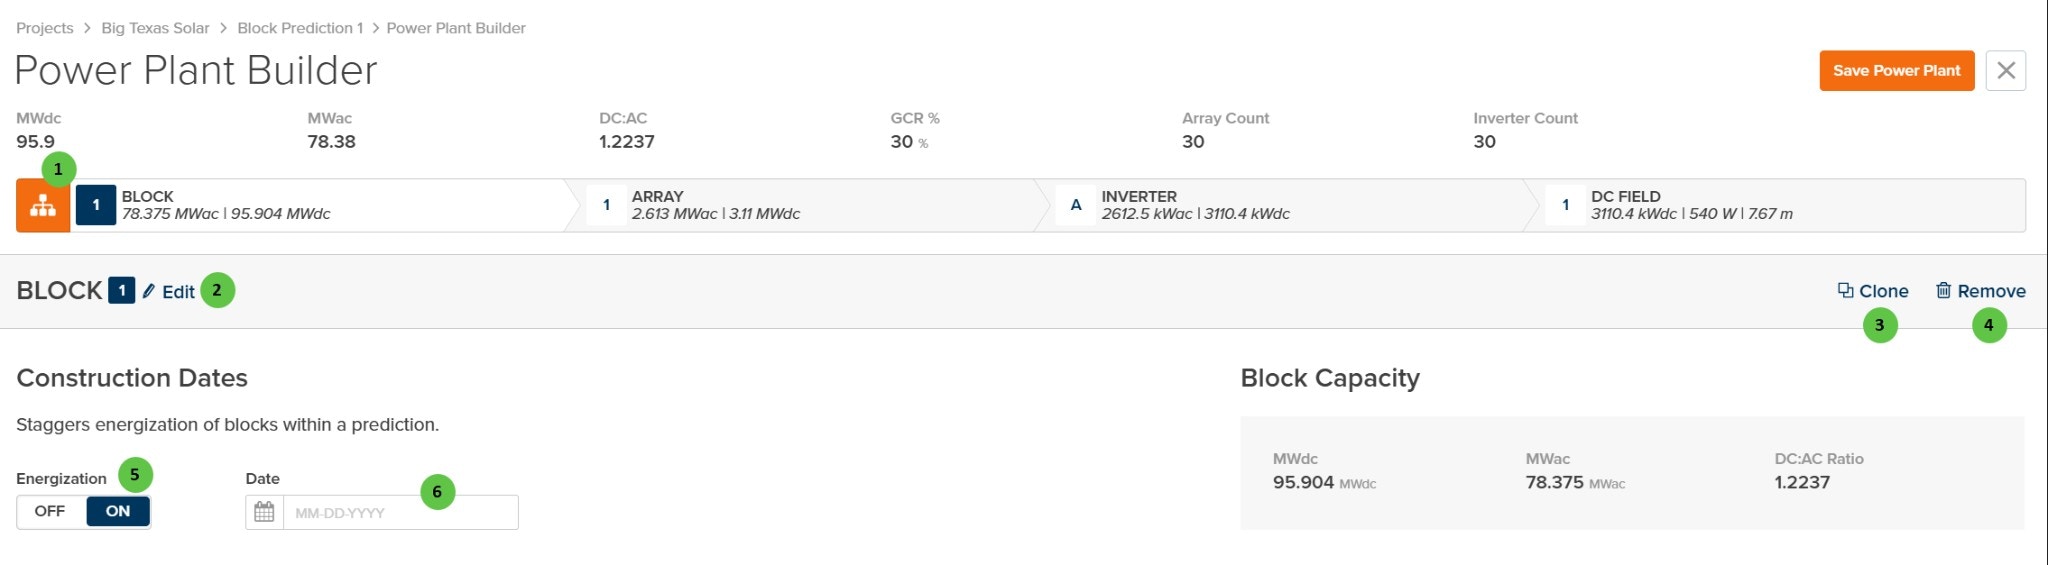
Power Plant Builder - Condensed View
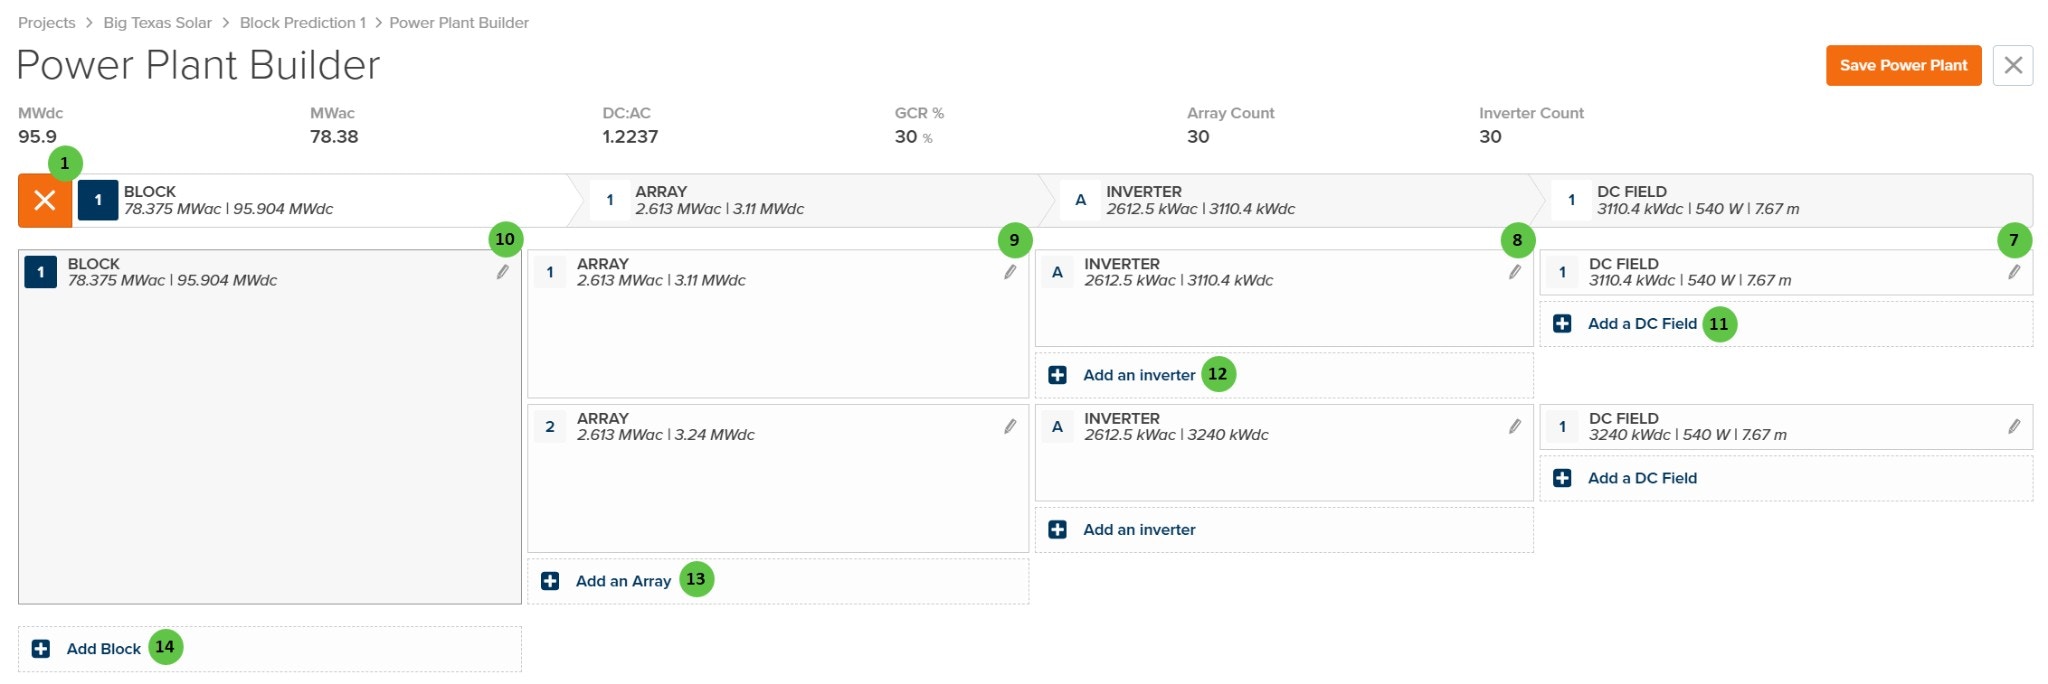
Power Plant Builder - Expanded View
Overview
The Power Plant Builder Page is organized into the following sections:- Header Bar — Displays summary metrics (MWdc, MWac, DC:AC ratio, GCR%, Array Count, Inverter Count) and the Save Power Plant button.
- Hierarchy Navigation Bar — Shows the plant topology as BLOCK → ARRAY → INVERTER → DC FIELD. Click to toggle between condensed and expanded views.
- Block Details (Condensed View) — Shows individual block configuration including construction dates and block capacity summary.
- Hierarchy Tree (Expanded View) — Shows the complete tree structure allowing you to add, edit, and navigate to any component in the plant hierarchy.
User Inputs
| # | Input | Type | Units | Description | Related Documentation |
|---|---|---|---|---|---|
| 1 | Toggle View | Button | — | Toggles between condensed view (showing block summary and construction dates) and expanded view (showing the full hierarchy tree). Located on the hierarchy navigation bar. | — |
| 2 | Edit (Block) | Button | — | Opens the Block configuration dialog to edit block-level parameters including the block name and repeater count. | Block Overview |
| 3 | Clone (Block) | Button | — | Creates a copy of the selected block including all arrays, inverters, and DC fields within it. | — |
| 4 | Remove (Block) | Button | — | Removes the selected block and all associated arrays, inverters, and DC fields. This action requires confirmation. | — |
| 5 | Energization | Toggle | — | When ON, enables construction date staggering for the block. This allows different blocks to have different energization dates, which affects degradation calculations. | Degradation |
| 6 | Date | Date Picker | — | Sets the energization date for the block. Only enabled when Energization toggle is ON. Format: MM-DD-YYYY. | — |
| 7 | DC Field (Edit) | Button | — | Click the edit icon to open the DC Field configuration page. The DC Field defines the module specifications, string configuration, and field-level losses. | DC Field - Table |
| 8 | Inverter (Header) | Display | — | Shows inverter summary in the hierarchy navigation bar including AC capacity (kWac) and DC capacity (kWdc). | Inverter Overview |
| 9 | Inverter (Edit) | Button | — | Click the edit icon to open the Inverter configuration page. The Inverter defines the inverter model, setpoint, and AC-side parameters. | Inverter, Inverter Overview |
| 10 | Block (Edit in List) | Button | — | Click the edit icon in the expanded view to open the Block configuration dialog. | — |
| 11 | Add a DC Field | Button | — | Adds a new DC Field to the selected inverter. Multiple DC fields can be connected to a single inverter. | DC Field Aggregation |
| 12 | Add an Inverter | Button | — | Adds a new inverter to the selected array. Multiple inverters can be configured within a single array. | Inverter Overview |
| 13 | Add an Array | Button | — | Adds a new array to the selected block. Arrays represent groups of inverters that share common characteristics such as transformer and AC collection. | Array |
| 14 | Add Block | Button | — | Adds a new block to the power plant. Blocks are top-level groupings that can have independent construction dates and may represent physical sections of the plant. | — |